
YOGA
Lizard Pose: A Complete Guide to Form & Flexibility

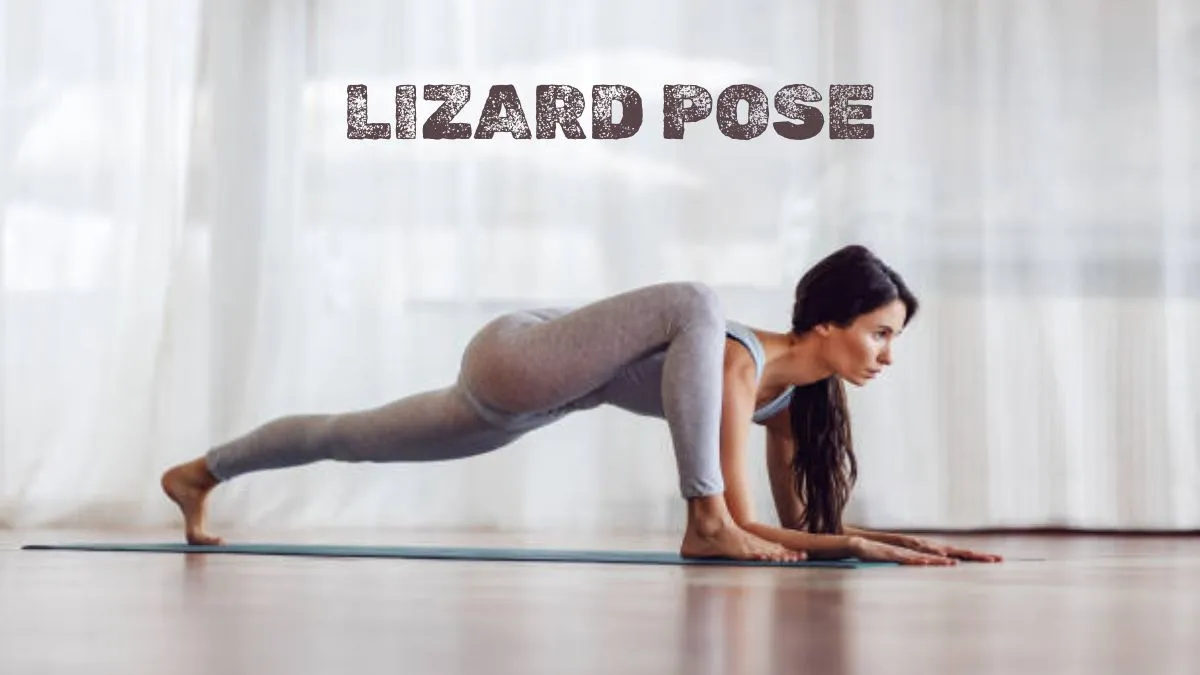
Lizard Pose, or Utthan Pristhasana, is a deep lunge that places the front hip into flexion while challenging the hip flexors, adductors, hamstrings, and gluteal muscles. Unlike a simple forward lunge, the front foot is positioned outside the corresponding hand, creating more room for the pelvis and inner thigh to move.
The pose is often described as a “hip opener,” but that label is incomplete. What you feel depends on your anatomy, stance width, pelvic position, and whether your elbows reach the floor. Someone with limited hip mobility may feel the stretch mainly in the front of the rear hip, while another may feel more tension in the inner thigh or hamstring.
Table of Contents
How to Do Lizard Pose Correctly
- Start in a high plank or downward-facing dog.
- Step your right foot outside your right hand.
- Move the front foot far enough forward that the ankle is roughly under or slightly ahead of the knee.
- Keep the right knee tracking generally in the same direction as the toes rather than allowing it to collapse inward.
- Extend the left leg behind you and press through the ball of the left foot.
- Keep both hands on the floor first. Do not immediately drop onto your forearms.
- If your mobility allows it without losing control, lower the forearms toward the floor.
- Stay for several slow breaths, then push through the hands to return to the starting position.
Repeat on the other side.
What Should You Feel in Lizard Pose?
This is one of the most useful questions to ask because “stretching sensation” and “pain” are not interchangeable.
Depending on your position, you may feel tension around:
- The front of the rear hip
- The inner thigh of the front leg
- The hamstrings and gluteal region of the front leg
- The hip capsule and surrounding soft tissues
- The groin area
The sensation should generally be manageable and controllable.
A strong stretch is different from sharp, pinching, burning, numb, or electric pain. Those sensations are reasons to change position rather than push through.
Use the sensation to adjust the pose
| If you feel… | Try… |
| Strong groin stretch | Reduce the depth or bring the front foot slightly inward |
| Front-hip stretch in the rear leg | Lower the rear knee |
| Lower-back compression | Tuck the pelvis slightly and shorten the stance |
| Front-knee discomfort | Reduce depth and check that the knee follows the foot |
| Hamstring tension | Bend the front knee slightly more |
| No meaningful stretch | Gradually move deeper rather than forcing the elbows down |
Why Your Lizard Pose Feels Different on Each Side
It is normal for one side to feel dramatically tighter.
The difference may come from hip mobility, ankle movement, previous training, habitual movement patterns, or pelvic position. Your left and right hips do not have to produce identical sensations.
Instead of forcing the tighter side to match the easier side, compare control and comfort.
For example, suppose your right side allows your forearms to reach the floor but your left side does not. That does not automatically mean the left hip is “bad.” The difference may disappear when you shorten your stance, support your hands on blocks, or reduce hip abduction.
The useful question is:
Can I control this range without compensating elsewhere?
The Pelvis Changes the Entire Pose
One reason lizard pose can feel completely different from one person to another is pelvic position.
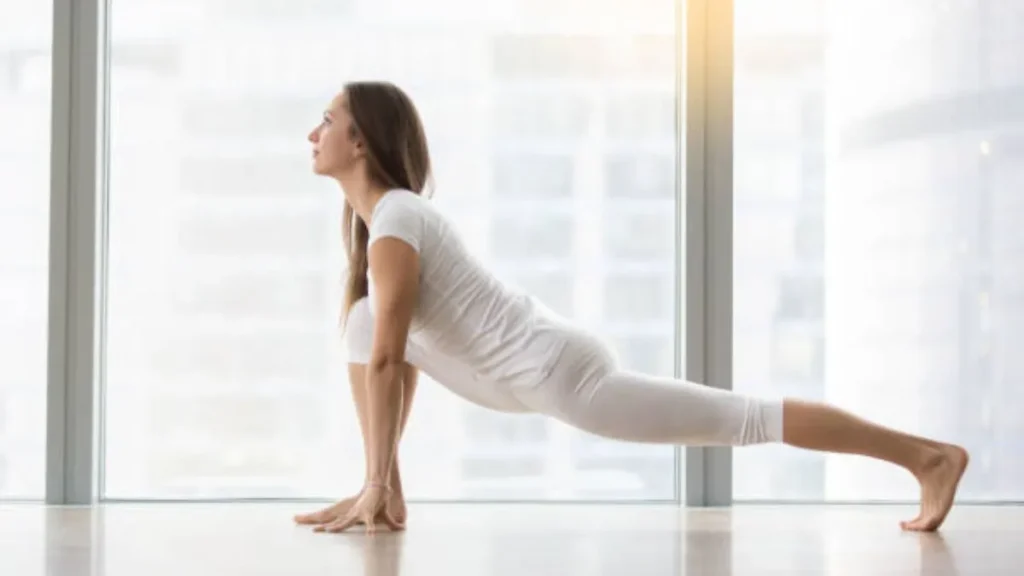
With the rear leg straight, the rear hip is placed into extension. If you lack comfortable hip extension, you may compensate by increasing the arch in your lower back or rotating the pelvis forward.
That can make the pose look deeper without creating more useful movements at the hip.
A simple correction is to:
- Keep the abdomen gently engaged
- Avoid aggressively pushing the pelvis toward the floor
- Keep the rear thigh active
- Lower the rear knee if the straight-leg version causes excessive lumbar extension
The goal isn’t to make the pelvis perfectly rigid. It is to prevent the spine from becoming the easiest way to manufacture extra range.
Lizard Pose Modifications for Beginners
1. Use Yoga Blocks
Place blocks under your hands instead of reaching directly for the floor.
This reduces the hip and hamstring flexion required while letting you maintain a longer spine.
Best for: Beginners, stiff hips, limited hamstring mobility, or anyone who loses control when reaching downward.
2. Lower the Rear Knee
Bring the rear knee to the floor.
This reduces demand on the rear leg and makes it easier to focus on the front hip.
Best for: Beginners and people who feel excessive tension at the front of the rear hip.
3. Keep the Forearms Elevated
If your hands are already on blocks, there is no reason to force the forearms onto the floor.
The elevated version may provide better control because you can maintain your pelvic position.
4. Shorten the Stance
A very long stance is not automatically a deeper or better lizard pose.
If your front knee feels unstable or your pelvis rotates excessively, bring the rear leg closer.
A shorter position often makes it easier to establish control before progressing.
Lizard Pose Variations: Which One Should You Choose?
| Variation | Main purpose | When to use it |
| Hands on floor | Basic mobility and control | Most beginners |
| Hands on blocks | Reduce required depth | Limited mobility |
| Rear knee down | Reduce rear-hip demand | Beginners or strong front-hip tension |
| Forearms elevated | Gradual progression | When floor forearms are too demanding |
| Forearms on floor | Greater hip-flexion demand | Only when comfortable and controlled |
| Front-foot turned outward | More hip-abduction demand | Experienced practitioners with adequate control |
You don’t need to progress through every variation.
Choose the version that gives you the right amount of challenge without losing position.
Common Lizard Pose Mistakes
Forcing the Elbows to the Floor
This is probably the most common mistake.
The forearm position is a variation, not a performance test. Forcing yourself downward can turn a controlled mobility exercise into an uncomfortable end-range stretch.
Letting the Front Knee Collapse Inward
The front knee doesn’t need to be perfectly vertical, but it should stay under active control.
If the knee repeatedly falls inward as you move deeper, reduce the range.
Overarching the Lower Back
If the pelvis moves forward and the lumbar spine takes over, you may feel as though you have created more depth.
You have changed the mechanics instead.
Try shortening the stance or lowering the rear knee.
Holding Your Breath
If you cannot breathe comfortably, the position may be too demanding.
Slow breathing is not just a relaxation strategy. It gives you useful feedback about whether you can tolerate the position without excessive bracing.
Comparing Your Depth with Someone Else’s
Hip structure, mobility, proportions, and training history differ from person to person.
The person beside you may have their elbows on the floor because their anatomy and mobility allow it, not because that depth is required for a “correct” lizard pose.
How Long Should You Hold Lizard Pose?
No single time is perfect.
For general mobility work, a short, controlled hold of around 20–30 seconds can be a practical starting point. More experienced practitioners may stay longer if the position remains comfortable and controlled.
You can also use repeated shorter exposures instead of one prolonged stretch.
For example:
20 seconds → come out → reset → repeat 2–3 times per side
This can be easier to control than immediately attempting a long static hold.
If your primary goal is mobility rather than passive flexibility, occasionally moving gently in and out of the available range may also be more useful than simply remaining motionless.
Lizard Pose vs. Low Lunge
| Feature | Lizard Pose | Low Lunge |
| Front foot position | Usually outside the hands | Usually between the hands |
| Hip demand | Higher | Usually more moderate |
| Adductor involvement | Greater | Usually, lower |
| Balance/control demand | Higher | Lower |
| Beginner-friendly | With modifications | Usually, easier |
| Main emphasis | Front-hip and inner-thigh mobility | Hip-flexor and general lunge mobility |
Neither is automatically better.
If low lunge already gives you a strong front-hip stretch with good control, there is no need to rush into the deepest lizard variation.
When Should You Modify or Avoid Lizard Pose?
Modify the pose if you experience persistent knee, hip, groin, or lower-back discomfort.
Also be cautious when returning to exercise after an injury or surgery. A deep range that feels acceptable during one session may not be appropriate during rehabilitation.
Stop rather than pushing through sharp pain, numbness, tingling, or a sudden loss of stability.
The objective of mobility work is to gradually expose the body to manageable ranges, not to prove how much discomfort you can tolerate.
The Best Way to Approach Lizard Pose
Think of lizard pose as a controlled exploration of hip range, not a flexibility competition.
Start with the version in which you can maintain a stable front leg, controlled pelvis, relaxed breathing, and a manageable stretch. Then gradually increase the challenge, perhaps by lowering the hands, extending the rear leg, or moving the forearms closer to the floor.
The deepest position isn’t necessarily the most effective. A better lizard pose is the one in which your body can control the range you have reached.




Lizard Pose: A Complete Guide to Form & Flexibility

Tech Etruesports: The Evolution of Competitive Gaming

Ceıvır: Traditional Turkish Dish with Rich Flavors

GNHUSTGames: The Ultimate Platform for Unblocked Games

Kraams: The Heart of Dutch Market Culture

Butterfly Position: How to Do Baddha Konasana Safely

Tissariss Textile Art: A Tradition of Cultural Weaving

Anna Archive: Free Shadow Library Search Engine

Bl_Faceless: Anonymous Digital Creators Redefining the Digital Space

Pepe Coin Overview: Inside the Meme Cryptocurrency Craze

Lotus Position (Padmasana): How to Do It Safely and Avoid Knee Pain

How to Prepare for a Gynaecology Appointment

RPDJAFUD: The Future of AI-Driven Cybersecurity and Automation

News JotechGeeks: Leading Source for Tech Updates

How to Meditate Daily Without Trying to “Empty Your Mind”
-
 GENERAL1 year ago
Christofle – For Those Who Dream of Family Heirloom Silver
-
SPORTS1 month ago
Discover the World of Football with Streameast: Watch Your Favorite Leagues and Tournaments
-
HOME IMPROVEMENT1 year ago
Spacious and Stylish 300cm Round Rugs: Elegant and Modern Designs for a Chic Home Decor
-
GENERAL8 months ago
Uncovering the World of кинокрадко: The Dark Side of Film Piracy