YOGA
Plow Pose (Halasana): Benefits, Steps, Safety & Modifications

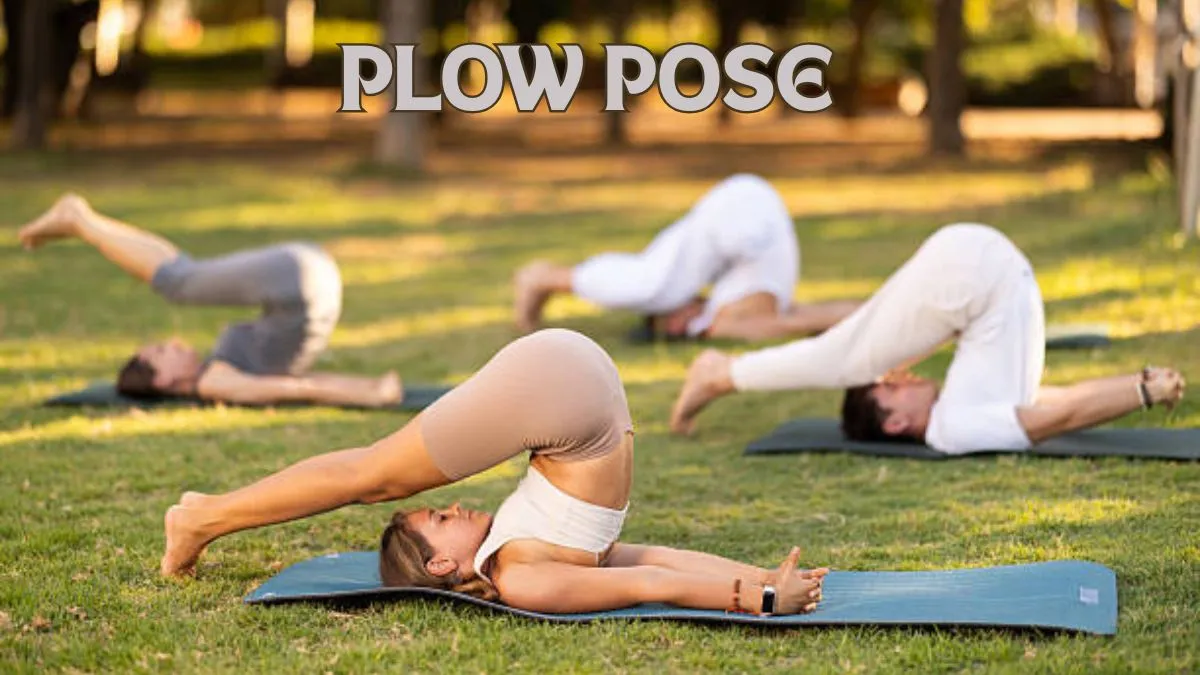
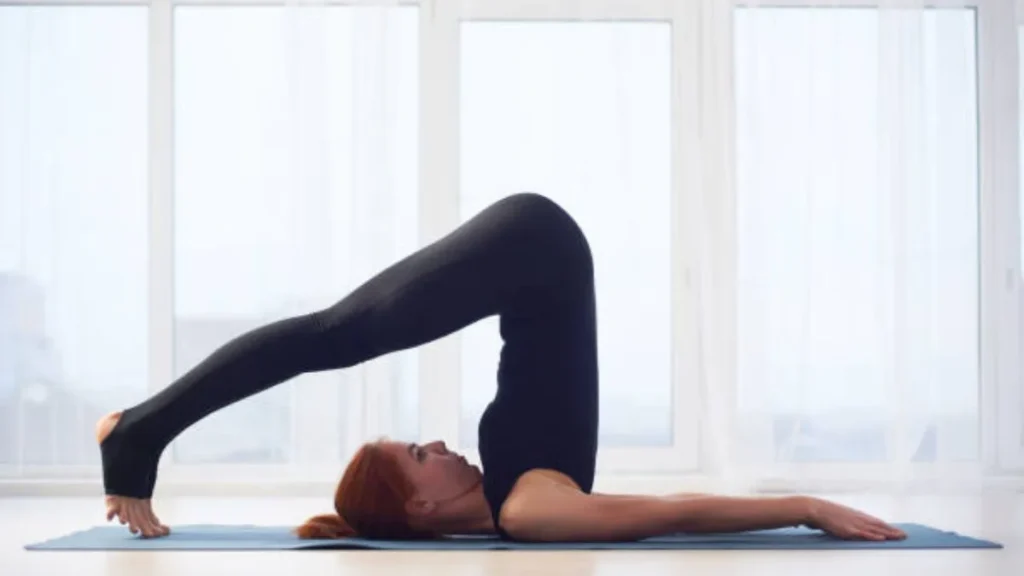
Plow pose, traditionally called Halasana, is an inversion in which the body rests on the shoulders while the legs travel overhead toward the floor behind the head. The distinctive shape resembles a traditional plow, but the important physical feature is not the shape itself: it is the combination of shoulder-supported body weight, spinal flexion, hip flexion, and controlled movement through the posterior chain.
Unlike a simple hamstring stretch, plow pose yoga keeps the cervical spine relatively fixed while the thoracic and lumbar spine flex. That distinction matters because forcing the feet toward the floor can increase the load on the neck rather than improving the posture. A technically correct Halasana is therefore less about touching the floor and more about maintaining controlled alignment without forcing range.
Table of Contents
How to Do Plow Pose Correctly
Warm up first with movements that prepare the shoulders, hamstrings, hips, and spine. A few rounds of gentle spinal flexion and extension, bridge pose, supported shoulder mobility, and a controlled shoulder stand progression can make the transition into Halasana considerably easier.
Step-by-step
- Lie on your back with your arms alongside your body and palms facing down.
- Lift your legs toward the ceiling while keeping the movement controlled rather than kicking upward.
- Continue lifting the pelvis so the legs move overhead. Use your hands to support the lower back if you are transitioning through shoulder stand.
- Once the legs travel behind the head, avoid deliberately pushing the neck into the floor. Keep the head facing upward.
- If your feet comfortably reach the floor, allow the toes to rest lightly rather than driving them downward.
- Keep the shoulders broad and the elbows from drifting excessively outward.
- Breathe slowly while maintaining a position you can control.
- To exit, support the pelvis and roll the spine down gradually, rather than dropping the legs toward the floor.
The most useful beginner cue is simple: move the pelvis and legs, not the head and neck. Your neck should remain quiet throughout the posture.
What Muscles Does Halasana Work?
Halasana is better understood as a whole-body positioning exercise than as a single-muscle stretch. The abdominal muscles help control pelvic and trunk positioning, while the hip flexors maintain the legs overhead. The hamstrings and gluteal muscles influence how far the hips can flex, and the spinal muscles control the transition into and out of the posture.
The shoulder girdle also matters. The shoulders and upper back provide the foundation that keeps excessive pressure away from the cervical region. This is why someone with flexible hamstrings can still have poor yoga plow pose mechanics: leg flexibility does not automatically provide adequate shoulder positioning or spinal control.
Potential Benefits of Plow Pose
It challenges posterior-chain flexibility.
The position combines substantial hip flexion with lengthening across the posterior chain. If your feet cannot approach the floor without your spine collapsing or your neck becoming uncomfortable, the limitation may come from hamstring or hip mobility rather than from an inability to “do” Halasana.
It develops positional control.
The transition into and out of plow yoga pose requires the trunk and pelvis to move as a coordinated unit. That makes controlled entry more valuable than simply holding the final shape for a long period.
It can complement a broader yoga practice.
Yoga has evidence for improving symptoms and function in some people with chronic nonspecific neck pain. However, that evidence does not establish Halasana itself as a treatment for neck pain. Systematic reviews have reported beneficial effects from yoga programs while also emphasizing variation between interventions and limitations in the evidence.
That distinction prevents a common mistake: assuming that because a complete yoga program may help with neck symptoms, every advanced yoga posture is automatically appropriate for someone with neck pain.
The Neck Issue Most Beginners Miss
The cervical spine is the main reason Halasana deserves more technical attention than an ordinary seated stretch. In the posture, the head remains on the mat while the shoulders and upper back support the body; the cervical region therefore has less freedom to redistribute the load.
Do not turn your head while holding Halasana.
Looking sideways to check your feet or communicate with someone can introduce rotation into a neck position that is already constrained.
People with current neck pain, cervical disorders, recent neck injury, significant shoulder problems, or other relevant medical conditions should not use Halasana as a self-prescribed corrective exercise. Yoga-related adverse events are generally mild in epidemiological studies, but musculoskeletal injuries are reported, and published case reports have included serious events associated with demanding postures.
Who Should Modify or Avoid Plow Pose?
Don’t force Halasana just because an instructor or video demonstrates it.
Use professional guidance or choose an alternative if you have:
- Significant or unexplained neck pain
- A recent cervical or spinal injury
- Severe shoulder limitations
- Conditions for which inversions have been medically restricted
- Osteoporosis or substantially reduced bone strength
- Symptoms such as numbness, weakness, dizziness, visual disturbance, or unusual pain during the posture
People with glaucoma or other conditions affected by inversion or pressure changes should obtain individualized medical advice before practicing demanding inverted positions. Case-report literature has specifically identified glaucoma and reduced bone strength among conditions requiring caution with certain yoga practices.
The Best Modifications for Beginners
The goal of a modification is not to make Halasana look easier; it is to change the mechanical demand while preserving useful movement.
- Feet on a chair: Place a sturdy chair behind your head so the feet can rest on its seat. This reduces the need to reach the floor and can make the position substantially more accessible.
- Blanket under the shoulders: A carefully arranged folded blanket can change shoulder and neck positioning but use it only when you understand the setup and have enough space to stay stable. Don’t place your head on an unstable stack.
- Half plow: Keep the legs elevated rather than forcing the toes to the floor. This is often the better option when hamstring mobility limits the full posture.
A useful progression is to improve movement quality before increasing range. If your feet reach the floor only when you aggressively round the spine or feel pressure in the neck, you have exceeded the useful range.
Five Common Plow Pose Mistakes
1. Forcing the feet to the floor
Touching the floor is not the performance standard. If the pelvis, spine, or neck loses control to achieve it, the extra range has little practical value.
2. Moving the head
Never rotate or lift your head while loaded in the posture. Exit the pose if you need to reposition.
3. Collapsing the shoulders
When the shoulders lose their supportive position, the posture can become much less stable. Work on shoulder mobility and upper-back control rather than compensating by forcing the legs farther overhead.
4. Holding the breath
Breath-holding often accompanies excessive effort. Slow, comfortable breathing is a useful practical test: if you cannot breathe normally, reduce the intensity or come out of the pose.
5. Dropping out of the posture
The exit is part of the exercise. Allowing the legs to fall rapidly toward the floor removes the controlled spinal movement that should accompany the descent.
Plow Pose vs. Shoulder Stand
| Feature | Plow Pose | Shoulder Stand |
| Leg position | Overhead behind the head | Usually vertical |
| Main challenge | Hip flexion and posterior-chain range | Whole-body vertical control |
| Foot contact | May reach the floor or support | Usually no floor contact |
| Mobility demand | High | High |
| Neck considerations | Significant | Significant |
| Beginner approach | Use props and partial range | Learn with qualified instruction |
How Long Should You Hold Halasana?
There is no universally correct holding time. For a new practitioner, a short, controlled hold is more useful than chasing a long duration while alignment deteriorates.
A practical approach is to hold only as long as you can maintain steady breathing, a quiet neck, stable shoulders, and controlled leg position. When one of those elements disappears, reduce the range or exit rather than treating discomfort as a flexibility target.
A Better Way to Judge Your Halasana
Use this four-point check before increasing depth:
- Neck: No pain, compression, or urge to turn the head.
- Shoulders: Stable and supporting position.
- Breathing: Smooth rather than strained or held.
- Exit: You can return to the floor slowly and deliberately.
If all four are present, increasing range gradually may be reasonable. If one fails, modify the posture instead of pushing harder.
Final Takeaway
Plow pose is a precision posture, not a flexibility contest. The useful version of Halasana is the one in which the shoulders provide a stable base, the neck remains quiet, the legs move overhead under control, and the practitioner can breathe and exit without losing alignment.


What a Transparent Chiropractic Fee Structure Covers

What Is a Medical Pedicure? Why Podiatrist Foot Care Matters Most

Bebasinindo: Championing Freedom in Indonesia

Ankwave: Future of Connectivity with Energy-Efficient Solutions

Afruimwagens: Efficient Mobile Carts for Workspaces

Understanding Formula 1 Standings and Championship Rankings

Do Cats Fart? A Scientific and Behavioral Look at Feline Gas

Hatha Yoga: Balancing Body, Mind, and Energy

Wave_of_Happy_: Cultivating a Positive Mindset for Lasting Joy

Gamer Challenger: Definition, Role, and Competitive Focus

Slope Unblocked: Free Online 3D Ball Running Game

Brand Name Normalization Rules: A Complete Practical Guide

Veneajelu: The Finnish Art of Peaceful Summer Boating

The Journey of iamnobody89757: From Anonymous User to Internet Sensation

Adsy.pw/hb3: The Future of High-Impact Digital Advertising
-
 GENERAL1 year ago
Christofle – For Those Who Dream of Family Heirloom Silver
-
GENERAL9 months ago
Uncovering the World of кинокрадко: The Dark Side of Film Piracy
-
SPORTS2 months ago
Discover the World of Football with Streameast: Watch Your Favorite Leagues and Tournaments
-
HOME IMPROVEMENT2 years ago
Spacious and Stylish 300cm Round Rugs: Elegant and Modern Designs for a Chic Home Decor