YOGA
10 Backbend Yoga Poses for Beginners
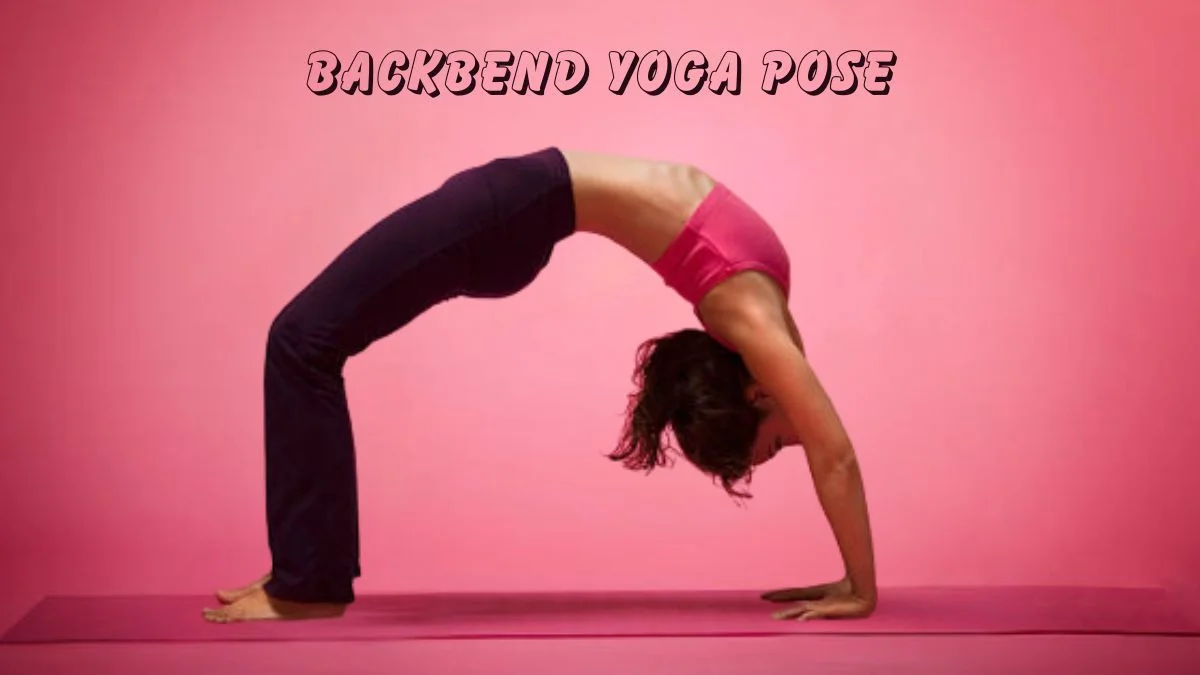
Backbend yoga poses are an essential part of yoga asana practice, they seem to be very difficult to perform. Whether you are a fresh yogi or an advanced practicer, incorporating backbend yoga poses into your practice offer a wide range of physical and mental benefits. Backend yoga poses have been proved to help improve posture, increase flexibility, strengthen muscles, boost energy level, and reduce stress and anxiety.
Table of Contents
What are the benefits of backend yoga poses?
1. Backbend yoga poses help to improve posture accuracy and spinal alignment.
2. Backbend yoga poses are good for promoting overall mobility and increasing flexibility. Through the process, your muscles on back, hips and core are strengthened and stretched, your balance and stability are improved.
3. Backbend yoga poses enhance your breathing ability and lung capacity, as these poses open your chest and have been shown to improve cardiovascular and respiratory health
As long as backbend yoga poses benefits so much, it is important to be fully warmed before practicing backbend yoga poses. Read on to get 10 beginner friendly backbend yoga poses, with step by step instruction included.
10 easy backbend yoga poses
1. Upward facing dog pose
- Start from lie facedown on your stomach with your feet about a hip-width apart.
- Adjust your hands, then inhale and push up, meanwhile engage both legs.
- Distribute your weight.
- Push your sternum forward and activate your arm muscles.
- Hold for a few breathes, bend the elbows, release.
2. Camel pose
- Start from kneel pose, place them hip-width apart, and then tuck your toes.
- Engage your inner thighs, draw your lower belly in and up, and roll your shoulders back.
- Inhale, lengthen through both side waists, lift the chest up,
3. Bridge pose
- Start from lie on your back and bend your knees.
- Lift your hips, meanwhile tuck your chin.
- Interlace your hands behind your back.
- Relax your glutes and engage your inner thighs.
- Lift your hips higher.
- Hold for a few breathes, then release.
4. One leg bridge pose
- Start from bridge pose, roll your shoulders underneath your body and clasp your hands.
- Press firmly into your left foot, then lift your hips as high as your can.
- Press evenly through your left foot , remember do not roll to the outer edge of your foot.
- Hold for a few breathes, release, repeat on the other leg.
5. Snake pose
- Start from lie face down on the mat with your feet hip-width apart and your arms resting by your sides, palms facing up.
- Interlace your hands behind your back and press the tops of your feet into the mat. Inhale, lift your chest.
- Exhale, draw your shoulders back.
6. Full bow pose
- Start from lie on your belly, with your hands by your side, palms facing up.
- Bend your knees and take hold of your ankles with your hands.
- Press your pubic bone down, draw your lower belly in and up.
- While inhale, press your ankles in your hands, lifting your chest and thighs.
- Slide your shoulder blades down and towards each other to open your chest.
- Hold for a few breathes, then release.
7. Fish pose
- Start from lie flat on your back on the yoga mat.
- Bring your forearms to your sides, then lift the upper body off the ground.
- Rest your weight on your hips and forearms, remember to keep the lower body on the ground.
- Hold for a few breathes, then release.
8. Reclining hero pose
- Start from lean onto your hands, then your forearms and elbows.
- Once you are on your elbows, place your hands on the back of the pelvis and release your lower back and upper buttocks by spreading the flesh down toward the tailbone.
- Then finish reclining, either onto the floor or a support blanket or bolster.
9. Half pigeon pose
- Start from a lounging position, the hips are parallel and squared to the earth with the front knee bent in a 90-degree angle and flat on the earth.
- The front foot rests close to the groin.
- The back leg is extended with the knee and the back foot squared, parallel and pressed firmly into the earth.
10. Standing backbend yoga pose
- Start from Mountain pose, place the palms on the low back with the fingers pointed down.
- Press into the feet, pull up the knee caps, and squeeze the thighs and buttocks.
- Press the hips forward and begin to arch the torso backwards.
- Use the arms to support your weight and keep the legs and buttocks engaged and strong.
- Hold for a few breathes, then release.
Final thoughts on backbend yoga poses
There are plenty advanced backbend yoga poses out there not included in this article, such as wheel pose, reverse table pose, tiger pose and etc. Please note that above mention backbend yoga poses are intended for fresh yoga practicers, it is important to practice back-bending poses gradually, with attention to alignment and alongside postures to neutralize the spine. One goal at a time, with gradually practice, everybody will improve from session to session.
It is said that wearing matching yoga set will boost your yoga performance, check out our sports bra and leggings set that can take you from a casual stroll downtown to an intense workout session.


Social Media Scheduler Guide: Features, Benefits, Best Practices & Tools

Eagle Pose: Quick and Easy Guide

Happy Baby Pose: Benefits, Steps, and Tips for Beginners

Detoxify Your Body and Mind with Dragon Pose: A Step-by-Step Guide

Flemington’s Complete Healthcare Network: Top Providers Working Together for Community Wellness

How Shared Workspaces Accumulate Bacteria in Places Nobody Thinks to Clean

How Varifocal Glasses Are Better Than the Rest

How Guests Leave a Space Differently Than Residents and What That Means for Effective Cleaning Practices

Retail Store Layout Mistakes That Cost Businesses Sales

Common Conditions Managed by Rheumatologists in Singapore
What to Know Before Getting Dental Implants in The Woodlands, TX

Respiratory Health Supplements: Supporting Healthy Breathing Naturally

Why a Clean Workplace Is Central to Employee Wellness and Focus

When the Mat Becomes a Mirror: Mindfulness, Emotional Regulation, and the Practice That Actually Lasts

Youtu-chan: Your Daily Dose of Anime & Game News
-
 GENERAL1 year ago
Christofle – For Those Who Dream of Family Heirloom Silver
-
SPORTS1 year ago
Discover the World of Football with Streameast: Watch Your Favorite Leagues and Tournaments
-
GENERAL7 months ago
Uncovering the World of кинокрадко: The Dark Side of Film Piracy
-
GENERAL4 months ago
Unveiling the Art of преводсч: How Translators Bridge Language Barriers