
HOME IMPROVEMENT
A Step-by-Step Guide to Effective Mould Treatment
The mere thought of it makes most homeowners cringe. It’s not just unattractive; it’s a real nuisance. If left untreated, Mould Treatment can damage your property, compromise indoor air quality, and even cause health issues for you and your family.
But fear not—while mould may be stubborn, it’s not invincible. Whether you’re dealing with a few stubborn spots in the bathroom or a larger infestation lurking behind the walls, this step-by-step guide will walk you through effective mould treatment to help you reclaim your home.
Table of Contents
Why Mould is More Than Just an Eyesore
Before we jump into treatments, it’s important to understand why mould deserves more attention than a quick swipe with a damp cloth.
Mould, particularly black mould (Stachybotrys), can cause serious health problems, including allergic reactions, respiratory issues, and headaches. Property-wise, mould thrives in moist environments, feeding on organic materials like wood, drywall, and even carpeting, slowly degrading them.
If you’ve noticed any telltale signs—musty smells, discoloration, or those pesky black or green patches—consider this your cue to act.
Step 1: Find the Root Cause of the Mould
Tackling mould starts with figuring out why it’s growing in the first place. Mould thrives in damp conditions, so look for sources of moisture in the affected area.
Here are some common culprits:
- Leaky pipes: Check under sinks and inside walls if visible.
- Poor ventilation: Bathrooms, kitchens, and laundry rooms often trap steam.
- Condensation: Windows and cold surfaces are frequent offenders.
- Roof or gutter leaks: These can lead to water seeping into your home, especially in attics.
Fixing the source of moisture is crucial. Without doing so, any mould treatment solution will only provide temporary relief.
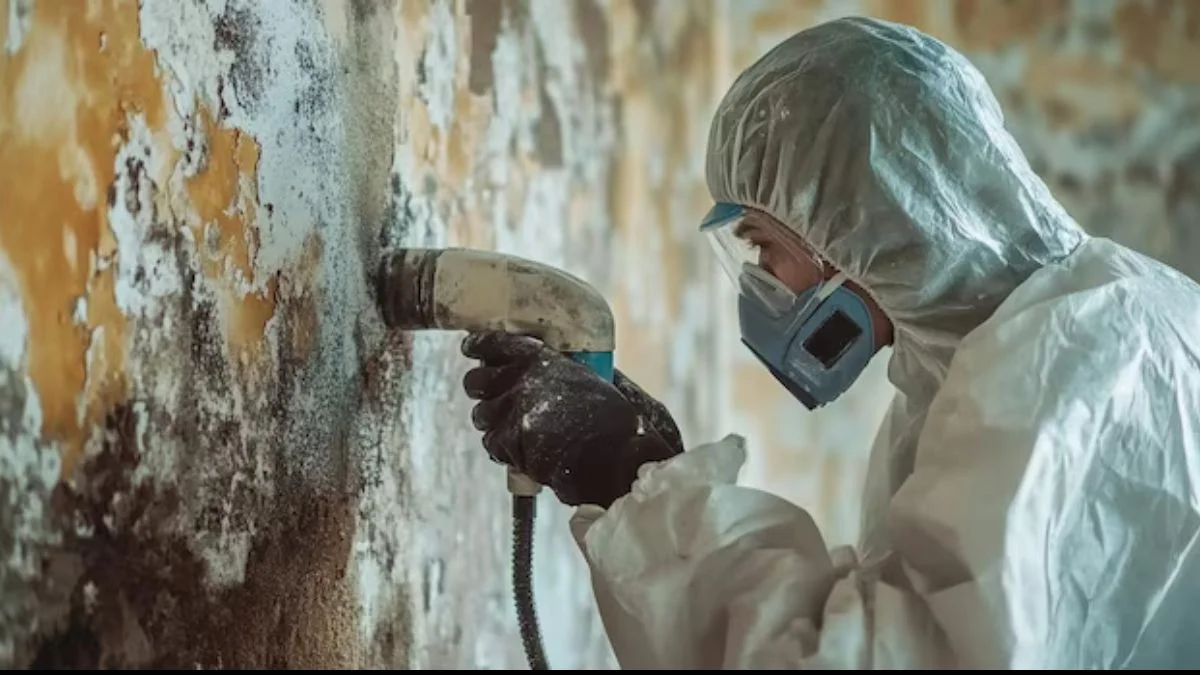
Step 2: Grab the Right Tools and Materials
Mould treatment isn’t a task you tackle with your bare hands. Equipping yourself with the right tools and safety gear will make the process safer and more effective.
You’ll need:
- Protective gear (gloves, goggles, and a mask or respirator)
- A scrub brush or sponge
- Distilled white vinegar or commercial mould treatment products
- Soap and warm water
- Baking soda (optional, for natural scrubbing power)
- A spray bottle
For larger mould issues, you may need stronger products containing hydrogen peroxide or bleach, but proceed with caution—these chemicals can be harsh.
Step 3: Containment is Key
Before you start scrubbing away, you need to control the spread. Mould spores are tiny and can easily get carried off into the air, especially if disturbed.
How to contain mould:
- Shut doors to the affected area.
- Turn off air conditioning or fans to avoid circulating spores.
- Use plastic sheeting to cover nearby areas or items.
This step minimizes the risk of mould spreading to other parts of your home while you work on the affected area.
Step 4: Scrub Away the Mould
Now comes the satisfying part—getting rid of the mould! For small patches (less than 10 square feet), here’s what to do:
- Mix soap with warm water and use this as a pre-wipe to clean the surface of loose debris.
- Spray the affected area with vinegar or your chosen mould treatment solution.
- Allow it to sit for at least 30 minutes to an hour to break down the mould.
- Using your scrub brush or sponge, vigorously scrub the mouldy spots until they’re visibly clean.
- Rinse with clean water and dry the area thoroughly using a towel.
For tougher stains, you can sprinkle baking soda on the patch before scrubbing or reapply the vinegar for a second round.
Pro Tip:
Avoid mixing bleach and vinegar—it creates toxic fumes. Stick to one product at a time.
Step 5: Dispose of Contaminated Materials
Sometimes, the mould infestation affects materials that are beyond saving, like waterlogged carpet or damaged drywall. Unfortunately, these items need to go.
Carefully remove the affected material, seal it in plastic bags, and dispose of it properly. Be sure to wear protective gear to avoid direct contact with spores.
Step 6: Prevent Future Mould Growth
Hooray! The mould is gone. Now what? To ensure it doesn’t come back, you need to implement preventative measures.
Here are a few tips to stop mould in its tracks:
- Repair leaky pipes, windows, or roofs promptly.
- Improve ventilation in high-moisture areas like the kitchen and bathroom by using fans or dehumidifiers.
- Use anti-mould paint in vulnerable areas.
- Dry wet areas immediately—don’t leave spills or condensation unattended.
- Regularly clean and maintain gutters to avoid leaks into your home.
Prevention is easier than treatment, so a little proactive maintenance goes a long way.
When to Call in the Pros
If the mould covers a large area (over 10 square feet), keeps recurring after treatment, or causes persistent health symptoms, it’s best to call in a professional mould remediation service. Some mould infestations run deep into walls or HVAC systems and require specialized expertise to tackle safely.
Wrap-Up
Dealing with mould can be unpleasant, but with the right approach, you can eliminate it and restore your home’s comfort and safety. By acting quickly, fixing any sources of moisture, and using proper mould treatment techniques, you can feel confident in fighting back against this pesky invader.
Got a particularly stubborn case of mould? Reach out to a professional for help—you’ll save time and ensure the issue is thoroughly resolved.
Remember, a mould-free home isn’t just about appearances. It’s about creating a healthier, happier environment for you and your family.

Holistic Chiropractic Care: A Comprehensive Approach to Health and Wellness

How to Stay Anonymous on the Internet

How Medical Treatment Timing Affects Your Car Accident Claim

OTI IAS: Modern UPSC Preparation Competency Model

Why Local Connection Still Matters When Choosing NDIS Providers in Preston

Privacy Curtain Design Considerations for Hospitals, Clinics, and Medical Centers

Medical Software Solutions: Comprehensive Guide for Choosing a Robust DAX Copilot Alternative

How DAX AI Scribe Transforms Patient Documentation Efficiency

Artificial Fall Wreath vs Natural Fall Wreath: Which Looks More Authentic?

Faux Plants vs Real Plants: Which Is More Cost-Effective for Home Decor?

Pravi Celer: Stalk Celery Uses, Benefits, and Identity

What Is Stormuring? A New Era of Strategic Agility

Foenegriek (Fenugreek): Health Benefits, Uses & Substitutes

Uncuymaza: Leading Higher Education in Mendoza, Argentina

BCN Play OTT: Basic & Platinum Streaming Bundles
-
 GENERAL12 months ago
Christofle – For Those Who Dream of Family Heirloom Silver
-
SPORTS1 year ago
Discover the World of Football with Streameast: Watch Your Favorite Leagues and Tournaments
-
GENERAL5 months ago
Uncovering the World of кинокрадко: The Dark Side of Film Piracy
-
GENERAL2 months ago
Unveiling the Art of преводсч: How Translators Bridge Language Barriers