GENERAL
Fiber Laser Marking Too Deep? How to Control Marking Depth

In daily production, fiber laser marking should create clear marks without damaging the surface. But many users face the same problem: the marking is too deep. Instead of a clean result, the surface becomes rough, burned, or uneven. This happens often when marking metal or plastic with a fiber laser. This article explains why fiber laser marking becomes too deep and how to control the marking depth in a practical way.
Table of Contents
Why Is Fiber Laser Marking Too Deep?
In most cases, deep marking means too much laser energy stays on the surface for too long.
This does not always come from one wrong setting. In real production, the problem often appears only after several tests. Power, speed, and frequency may look normal on their own, but together they create too much heat.

Laser Power Is Too High
High laser power is one of the main reasons for deep marking. Many operators increase power to make the mark clearer. But high power often removes too much material. Common results include deep grooves on stainless steel, burned anodized aluminum, and melted plastic surfaces. Lowering power is usually the first step to control depth.
Marking Speed Is Too Slow
Slow speed keeps the laser on one area for too long. This causes heat to build up and go deeper into the material. In many workshops, this issue is easy to miss. The mark looks clear at first, so the speed is kept low. After longer runs, the surface starts to change. Heat builds up slowly, and depth increases even if power is not high. Using higher speed with light passes often gives better results.
Frequency Setting Is Not Suitable
Frequency controls how often laser pulses hit the surface. Low frequency means higher energy per pulse. This often leads to deeper engraving. High frequency spreads energy more evenly and helps create shallow marks. Using low frequency for surface marking is a common mistake.
Pulse Width Is Too Long
Pulse width affects how much heat enters the material. Long pulse width causes more heat and deeper marking. Shorter pulse width helps control depth and keeps edges smoother. This setting is often ignored, but it has a strong effect on marking depth.
Focus Position Is Not Correct
Perfect focus creates the highest energy density. For shallow marking, this is not always the best choice. A small defocus can reduce depth while keeping the mark visible. This method works well for surface marking on metal parts.
Too Many Passes or Tight Hatch Spacing
Each marking pass adds more depth. If the number of passes is too high, depth increases quickly. Very small hatch spacing also increases overlap and makes marks deeper. Reducing passes and slightly increasing hatch spacing can help control depth.
Fiber Laser Marking Depth on Different Materials
Different materials react differently to laser energy. Using the same settings for all materials often causes depth problems.

Stainless Steel Marking Too Deep
Stainless steel absorbs laser energy well. If marking is too deep, reduce power, increase speed, use higher frequency, and try slight defocus. Low frequency and slow speed are better for deep engraving, not surface marking.
Aluminum Marking Depth Control
Aluminum reflects laser light but heats up fast once marking starts. Deep marking often damages the anodized layer. Using higher frequency and fewer passes helps protect the surface. It is better to mark the surface layer instead of removing base material
Plastic Marking Too Deep
Plastic melts easily under fiber laser energy. Deep marking on plastic usually means the parameters are not suitable. The table below shows the most common reasons seen in production.
| Parameter Issue | Typical Effect on Plastic |
| Laser power too high | Surface melts or deforms |
| Marking speed too slow | Heat builds up and causes deep marks |
| Pulse width too long | Material burns instead of changing color |
For plastic parts, surface color change is often better than engraving.
How to Reduce Marking Depth Without Losing Clarity
Clear marks do not need to be deep. Instead of increasing power, adjusting parameters in a balanced way works better. The table below lists common adjustment directions used in practice.
| Adjustment Method | Purpose |
| Increase frequency | Reduce single-pulse energy |
| Increase marking speed | Limit heat buildup |
| Use multiple light passes | Improve control over depth |
| Adjust pulse width | Reduce thermal effect |
| Slightly defocus the laser | Lower energy density on surface |
Good balance between settings works better than high power.
Common Mistakes in Depth Adjustment
One common mistake is changing many settings at the same time. When the result improves or gets worse, it is hard to know why. In practice, small changes work better. Testing one parameter at a time saves more time in the end.
Conclusion
If fiber laser marking is too deep, the cause is usually not one single parameter. Marking depth depends on energy balance, material type, and parameter combination. In real production, simple and controlled adjustments give more stable results.

Inside Scoop: Dhamaka Zone Celebrity Gossip Uncovered

RTasks EHR: Streamlined Care Management for Facilities

Explore Peñiculs: Holistic Framework for Complete Well-being

Retro Bowl 3kh0 Unblocked: Play the Classic Football Game Anywhere

SkyWestOnline: Complete Guide for SkyWest Employees

Setu Bandhasana Guide: Benefits, Technique & Safety Tips

How a Cooling Vest Helps You Recover After an Intense Workout or Yoga Flow

Top 10 Leading US Bronze CNC Machining Factory

Why Cybersecurity Is Essential for Modern Energy Infrastructure

Yoga Nidra: Deep Relaxation and Mindful Awareness

10 Benefits of Joining Prenatal Yoga Classes Online

TamilYogi: Pirated Tamil Movies & TV Shows

Discover Jadeitový kameň: Symbol of Purity and Strength

Discover Mannacote: The Natural Alternative to Chemical Preservatives

Why Many Americans Purchase HGH in Mexico
-
 GENERAL8 months ago
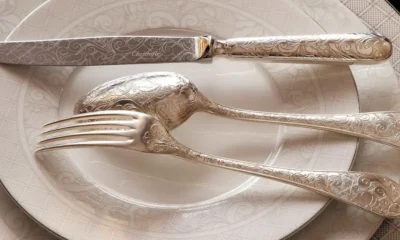
Christofle – For Those Who Dream of Family Heirloom Silver
-
SPORTS10 months ago
Discover the World of Football with Streameast: Watch Your Favorite Leagues and Tournaments
-
GENERAL2 months ago
Uncovering the World of кинокрадко: The Dark Side of Film Piracy
-
GENERAL5 months ago
ATFBooru: Anime, Gaming, and Subculture Imageboard