HEALTH AND FITNESS
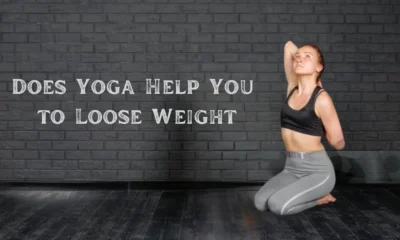
20 Minutes Yoga Routine to Help You Lose Weight
It seems 20 minutes yoga routine is too short for weight loss, the answer is yes. Doing yoga for 20 minutes a day will help you lose weight. It also can be done twice a day, preferably early in the morning and also in the evening. Doing 20 Minutes Yoga Routine will help you fasten your weight loss and better your overall health.
20 minutes yoga routine will rapidly increase your heart rate thus helping to burn fat faster. Yoga practice also boosts your mood. From toning your muscles, and stretching the whole body, to burning fat. Yoga benefits both your physical body and inner mind. The best thing about this 20 minutes yoga routine is, that you do not have to spend hours on burning fat, 20 minutes is very easy to achieve.
Table of Contents
Which type of yoga is best for weight loss?
Any kind of yoga that helps you increase your heart rate to a fat-burning zone will help you lose weight, to pick the most effective yoga type from all yoga forms, I think Hatha, and Ashtanga are the best two yoga types for weight loss. If you happen to care about your diet at the same time, you will see good results very soon. I have known cases that after a few weeks of practice, many yogis lost around 10 pounds. It is estimated that a 20 minutes Hatha Yoga session can help you burn 100 calories.
Do you lose belly fat with yoga?
It is confirmed that a person loses belly fat with yoga. Weight loss is an overall effect on one’s body, and belly fat is a part of your fat group. This is especially true when it comes to vigorous yoga practice, once your heart rate is raised to the fat-burning zone, the process of weight loss initiates.
Can yoga change your body shape?
Yes, yoga practice can help to change your body shape by helping you burn fat. As mentioned above, 20 minutes of yoga practice helps a person burn 100 calories, Imagine how many calories you will burn after months of yoga practice. Not to mention the other many benefits of yoga practice.
20 minutes yoga routine to help you lose weight
The following pose sequence creates a routine target to increase heart rate and burn fat, which is the key to losing weight, a certain level of heart rate is called the fat-burning heart rate zone. Practicing this routine will keep you maintaining a moderate to vigorous exercise intensity, and burn more calories in the end. As a result, practising this 20 minutes yoga routine for months will boost your metabolic rate, which means you will burn more fat at rest compared to if you do not. Put on your favourite yoga sports bra and yoga pants, and let’s begin.
I divided this yoga routine into two parts, part A consists of 10 poses and lasts around 15 minutes and part B is the rest part, which contains 3 poses, including the Savasana rest pose.
Part A: 10 poses / last around 15 minutes
Part B: 3 poses / last around 5 minutes
Part A, it is aiming at quickly guide you into the fat-burning heart rate zone, each pose is designed to activate your abdominal area and encourage you to get moving. Which is great for burning fat and building strength. Let’s get started to pose No. 1
No.1 Cat cow pose
Cat cow pose is a gentle flow between two poses and also is the start pose for yoga classes, it will warm up and lengthen your spine, getting you ready for intense exercise. Cat cow pose increases the flexibility of your neck, spine and shoulders, helps you to stretch muscles on your hips, back, abdomen and else. I think an easy start will give you motivation to overcome all difficulties and persistence in yoga practice.
How do cat-cow pose?
- First, keep your hands shoulder wide apart and knees directly below your hips;
- Then, inhale deeply and lower your lower back and bring your head up, tilt your pelvis like a “cow”;
- Third, exhale thoroughly and involve your abdomen, arch your spine and bring your head and pelvis down like a “cat”.
- Repeat three times, cat-cow poses take around 1 minute in total.
No.2 Plank pose
Here comes the first hard pose – the plank pose. The plank pose works the entire body effectively in one static position. It helps strengthen the abdominals, hands, back, core and else. After warming up through cat-cow poses, it is time to activate your muscles. Also, a plank pose is very helpful in reducing belly fat, when you practice a plank pose, your core area is the key to holding weight, the better your abdominal area is, the more stable you are.
How to do a plank pose?
- First, have your fingers widespread, with your middle finger pointed directly forward, shoulders over your wrists, and press your hands against the floor;
- Second, firm both arms in towards each other, have the lower belly in and up;
- Third, extend one leg and then the other, and hold yourself steadily in this high push-up position;
- Hold for 30 seconds, take a break, then repeat three times, plank pose takes around 3 minutes.
No.3 Upward facing dog pose
After the plank poses, flow smoothly into an upward dog-facing pose. The upward dog-facing pose is an amazing post to wake up upper body strength and stretch your chest, shoulders and upper abdomen area. Use your arms and wrists, also your back strength to support upper body weight, and stretch your chest. To prevent getting hurt, do not put all pressure on your wrists, this is a common mistake made by many beginners.
How to do an upward dog-facing pose?
- Lift upper body: after plank pose, put your knees down on the floor and take a breath, then use your arms to lift your upper body meanwhile make sure your knees do not touch the ground during the transition;
- Engage core area: eyes look upwards to come into an upward-facing dog, use your core area for better support;
- Hold for one breath, go on with downward facing dog pose, then an integral Vinyasa,
No.4 Downward facing dog pose
The downward-facing dog pose is right after the upward upward-facing dog pose, this pose involves your core area just as much as the plank pose, and it helps to stretch your limps and back a lot, it will increase heart rate rapidly, and burn fat at the same time. It is likely to get your wrists hurt if you do not involve your core area strength.
How to do a downward-facing dog pose?
- Transit from upward facing dog pose: put down both knees and lift your butt;
- Do an upside-down V: use abdomen strength to hold your hips, stretch all limps as much as possible;
- Hold five long breathes: make sure your wrists are not overwhelmingly under pressure;
- Do the complete Vinyasa from stand pose to upward facing dog pose, to downward facing dog pose, and repeat three times, this process takes around 3 minutes.
No.5 Three-legged dog to knee-to-nose flow
The legged dog pose comes right after the downward-facing dog pose. It helps stretch the lower body, hamstrings, calves and ankles. Also, it will increase your range of flexibility. Go with each leg for one around.
How to do three three-legged dog to knee to nose pose?
- After your last round of downward facing dog pose, lift your right leg up behind you, make yourself a three-legged dog;
- Move knee to nose: exhale thoroughly, bring right knee to nose rounding through the spine, this is not easy to do, and depends a lot on your range of flexibility;
- Pull belly toward spine: at the same time, your belly is pulled up and in, and the chin is tucked;
- Switch to another leg: after a deep breath, go back to the downward-facing dog pose and switch to another leg;
- This pose lasts around 1 minute.
No.6 Standing forward fold pose
After five vigorous poses, you are allowed to take a little break, standing forward fold pose is very easy to achieve and takes less strength compared with what you have been through. This pose is widely known as a resting pose, it urges you toward greater flexibility along your back body.
How to do a standing forward fold pose?
- From three-legged dog to knee-to-nose pose, go back to downward facing dog pose and walk both legs forward to the front of your mat;
- Back to standing pose: put your hands around your thighs and stand steadily;
- Bend forward: with your toes grasped, bending forward, your torso is over your legs, your hands may land next to your feet or just on the ground;
- Inhale and exhale three times: inhale and extend your chest to lengthen your spine;
- This pose takes around 30 seconds.
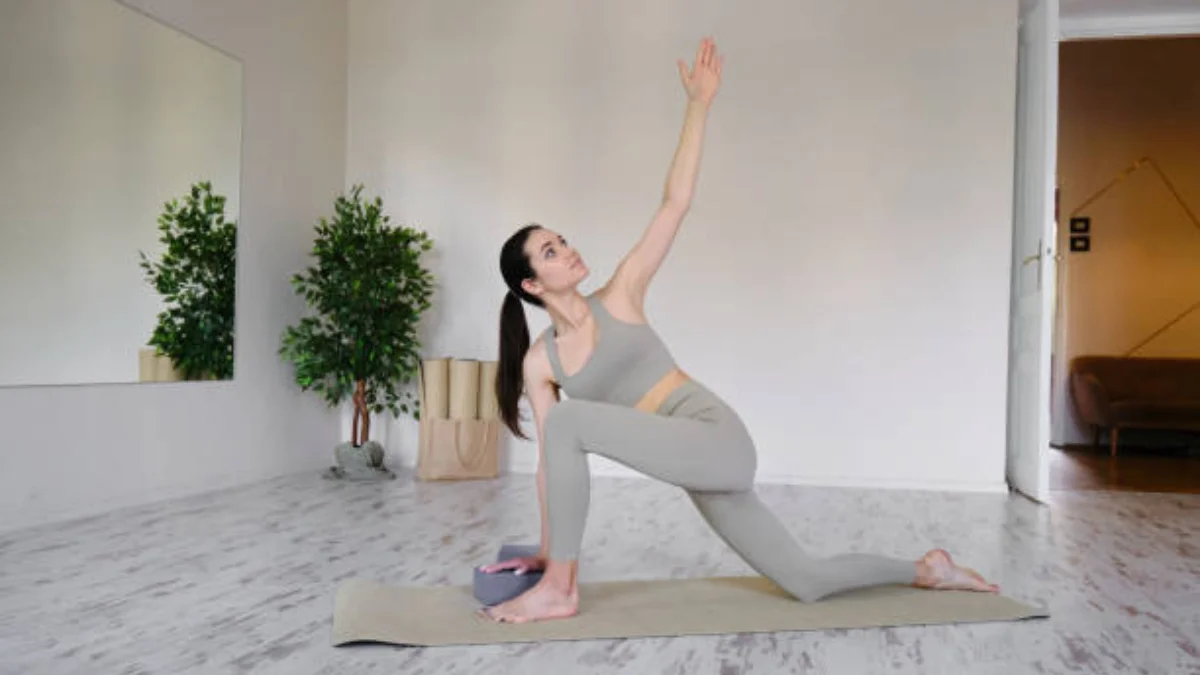
No.7 Warrior II pose
Here comes another difficult pose – the Warrior II pose. This pose is good for opening the hips and shoulders and it helps stretch the inner thighs and chests, also will strengthen your legs, abs and arms. It is relatively more difficult to keep a balance than the above-mentioned poses, use your thigh strength a lot stay low and bend one knee at a 90-degree angle, this is key to maintaining a balanced Warrior II pose.
How do Warrior II pose?
- Stand in a wide stance: face the long side of the mat, arms stretched straight out from shoulders and feet parallel to each other;
- Mind your toes: look down and make sure your toes are pointing slightly in;
- Raise your arms: as you inhale, raise your arms parallels to the floor, eyes looking forward;
- Bend the front leg: bend the front leg at a 90-degree angle, slightly adjust your feet to maintain balance;
- Stay in this pose for 5 breaths: meanwhile, engage your core to prevent rips from flaring out;
- This pose takes around 30 seconds.
No.8 Reverse warrior pose
The reverse warrior pose is a continued pose for the last one, it helps to strengthen the hips, arms, shoulders, torso and else, stretches your core area a lot, and also improves flexibility in the spine and chest.
How to do the reverse warrior pose?
- After the warrior II pose, transit to the reverse warrior pose;
- Lift your arm up to the ceiling: as you inhale, lift the front arm up to the ceiling, while lowering your back arm to the right knee;
- Engage core muscles: lift your chest while you become slightly backward bend, and use your core muscles to maintain balance;
- Come back to warrior II pose: hold it for one breath and come back to warrior II pose, then repeat on the other side;
- This pose takes around 1 minute.
No.9 Boat pose to low boat pose
Low boat pose is a variation of boat pose. Both poses require the engagement of core muscles a lot. You are asked to hold both poses for like 10 seconds. The boat pose is great for developing abdomen strength and kills belly fat in the process.
How to do boat pose and low boat pose?
- Start by sitting on your mat: remember to pull your spine tall and back straight;
- Bend your legs: Make your knee slightly touch your chest, of course, this depends on your range of flexibility, just do your best;
- Stay here or straighten both legs: this depends on your status, if you can, try to straighten your legs, and hold for like 10 seconds;
- Lower your legs if possible: slightly lean your upper body and lower your legs to a wider “V”, and hold for another 10 seconds;
- Repeat for three times: take a little break, and repeat these two poses for three times;
- This pose takes around 1.5 minutes.
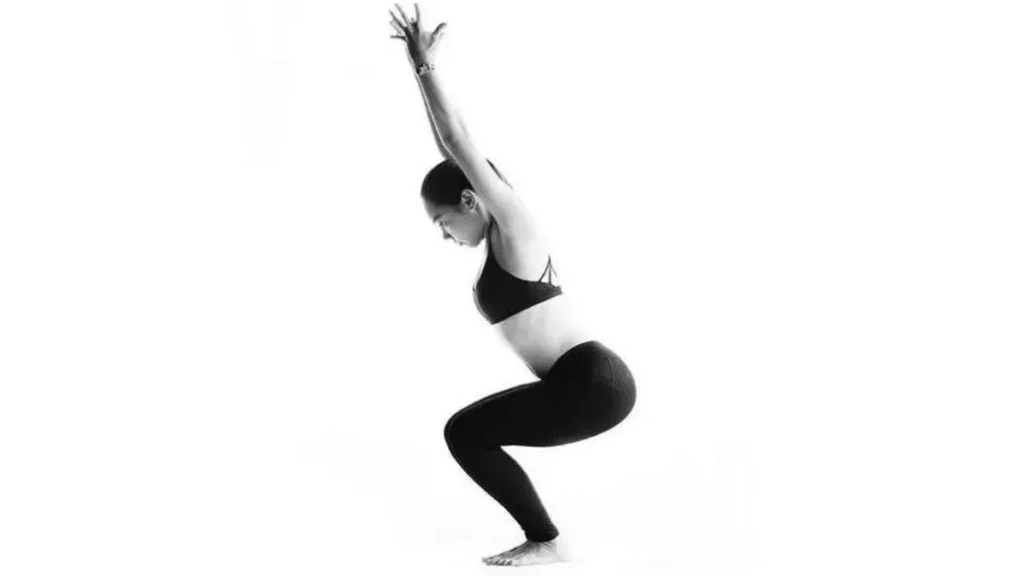
No.10 Bridge pose
Here comes the organism, bridge pose is one of the most classic poses for weight loss and also a difficult pose. As its name indicates, this pose requires you to bend your body to a bridge shape and hold for 5 breaths.
How to do bridge pose?
- Lie down on your back: while you lie on your back with knees bent on the mat, keeping toes flat on the mat;
- Place your arms: bring your arms alongside your body with palms down;
- Raise your hips: use your core muscle to raise your hips to create a straight line from knees to shoulders, at the same time, pulling belly button back toward your spine;
- Hold for 5 breathes and do baby pose: maintain this pose for like 5 breaths, then repeat for another round, come into baby pose for some break;
- This pose takes around 2 minutes.
For part B, is the ending part, but before end your exercise, there is a slight peak of this 20 Minutes yoga routine, which refers to the wheel pose and standing down pose, then is the rest pose.
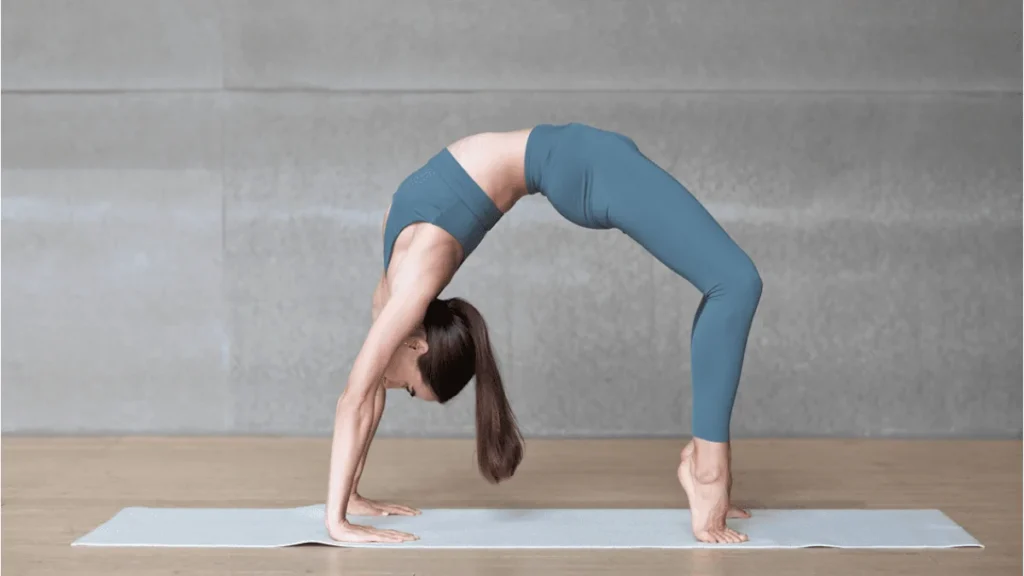
No.11 Wheel pose
For the record, please skip this pose if you think you are tired already after bridge pose, it is ok to admit so. Wheel pose is an advanced version of bridge pose, in my opinion. It involves your arm strengths to pull upper body based on bridge pose. It stretches the chest, shoulders, and hips in a way to counteracts our modern sedentary lifestyle.
How to do wheel pose?
- Bases on bridge pose: let your knees and feet turn outwards, keep them parallel;
- Use your arm strengths: push down hard into your hands and feet, lift your head and body off the ground;
- Hold for 20 seconds: keep breathing and come down slowly after hold for 20 seconds;
- This pose takes around 1 minute.
No.12 Upside down pose – yoga inversion (pass or use a wall to help you maintain balance)
Upside down pose is a kind of yoga inversion, it is also called headstand. Do this pose against the wall for safety concern if you are a fresh man in yoga practice, or just skip this pose. It helps strengthen the whole body and calms the brain.
How to do upside down pose?
- Stand against a wall and lean forward: place your forearms on the floor in front of you, bring your hands together and interlace your fingers;
- Make a crown for head using forearms: place your head against your palms;
- Life your stronger leg: after tuck your toes, life one knee toward your head until your hips are above your shoulders;
- Hold for 20 seconds: bend your knees for better balance if needed;
- This pose takes around 2 minutes.
No.13 Savasana pose
Congratulations, you made it. All the hard work will pay off in the future, Savasana is the last pose of this routine and it is no less important than other poses. Savasana is an ending, resting pose to restore your energy and get yourself prepared for further challenges, come on.
How to do Savasana pose?
- Lie down on the mat: put your limps flat on the ground, like ice cream melting onto the ground;
- Close your eyes: put your feet apart and arms alongside your body, then close your eyes;
- Relax: close your mind, allow yourself to fall asleep if you are that exhausted;
- This pose lasts like 2 minutes or longer if you want to.


Choosing an Orthopaedic Clinic in Singapore: Factors to Consider

Moviesjoy: Your Ultimate Guide to Free HD Movie Streaming

Project Valvrein: Revolutionizing Industries Through Digital Transformation

SFM Compile: Optimize Your Rendering Process

GadgetFreeks.com: Find the Perfect Name

4 Signs of Quality Hospice Care in Louisiana

GLP-1 Medications vs. Traditional Weight Loss: What Athletes and Active People Should Know

When Should You See a Fertility Specialist?

Navigating Pet Emergencies with 24-Hour Vet Care

Hip Exercises: A Science-Based System for Strong, Functional Hips

ENT Treatment Options for Snoring

Exploring What You Need to Know About MRSA

Getting Medical Supplies: 5 Tips on Choosing the Right Store

Nexus AlienSync: The Backbone of Interconnected AI Ecosystem

Influencersginewuld: The AI-Powered Future of Influencer Marketing
-
 GENERAL1 year ago
Christofle – For Those Who Dream of Family Heirloom Silver
-
SPORTS1 year ago
Discover the World of Football with Streameast: Watch Your Favorite Leagues and Tournaments
-
GENERAL6 months ago
Uncovering the World of кинокрадко: The Dark Side of Film Piracy
-
GENERAL2 months ago
Unveiling the Art of преводсч: How Translators Bridge Language Barriers